What is hosting or web hosting? This is a service that enables your site to be viewed via the World Wide Web. I like to regard my hosting provider as a landlord who has access to the internet. I rent space on their servers where I store my files and web pages, which in turn allows them to be viewed by internet users.
When I was in the process of deciding which hosting provider to use I narrowed it down to two companies, Bluehost and HostGator. These companies were both well established and had a proven track record. As a newbie this gave me confidence in dealing with them. My way of thinking is if something goes drastically wrong they would have the resources to fix it.
Both companies offer a good level of service and one of the most important points for me is that they both operate live 24/ 7 support. I would never sign up with a web hosting company that did not offer this. When I say “live” I don’t mean an automated response, I mean a live person that is available via online chat, telephone or email.
Using Bluehost or HostGator will cost you money. So if you are just starting out you could try some free web hosting sites before committing to a paid hosting agreement. You may find a free option that is more than adequate for your requirements.
I personally have not used these free services, so I can’t give many details of how they operate. I did a little research on the subject, that’s when it became apparent I would not have complete control over my site and restrictions or limits could be applied, so I decided not to take it any further.
Bluehost vs HostGator – Who Did I Choose?
As either provider could have met my needs, and most of the reviews I read were balanced between HostGator and Bluehost, it wasn’t easy to decide. In the end the deciding factor for me was cost. At the time I was ready to sign up I found a HostGator coupon which made HostGator work out slightly cheaper than Bluehost. This influenced my decision and I went with HostGator.
Update: I now use Bluehost as well as HostGator. I have published another post that shows how to set up an account with Bluehost and install WordPress. You can view it by clicking here.
Setting up Hosting with HostGator
Before going through the set up process shown below you need to have chosen a domain name. If you have not yet done so check out this post that gives you some tips and ideas on choosing a domain name.
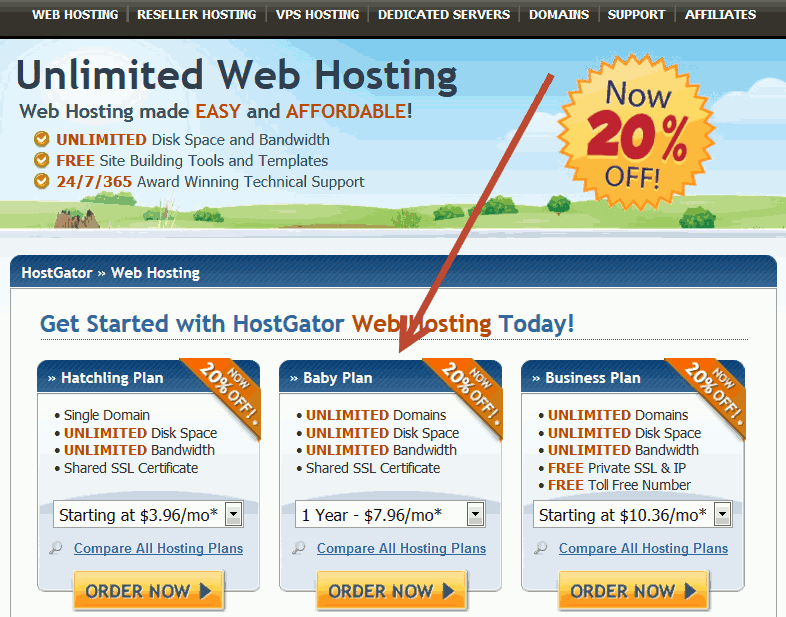
Once you have chosen a domain name go to HostGator and click on either of the links shown below.

Now choose your plan. I have the baby plan because of its unlimited domains and at the moment I find this is more than enough for my requirements. Note how the prices will become better value depending on how long you decide to sign up for, the longer the commitment the cheaper it is.
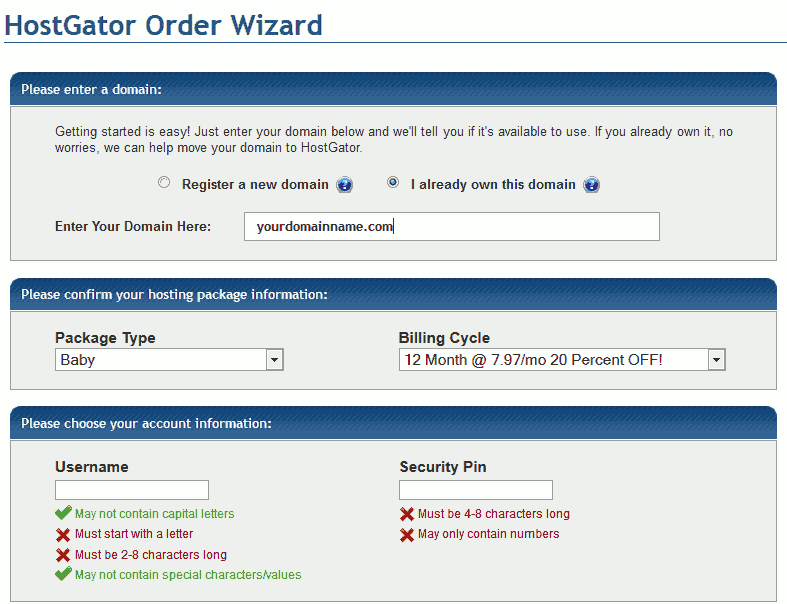
Next, if you have already registered your domain select “I already own this domain” and enter your domain as shown below. If you haven’t yet registered your domain you can do it now by selecting “Register a new domain” and the cost will be added to your order.
Check your hosting package details, then choose a username, security PIN and your method of payment and that’s just about it.
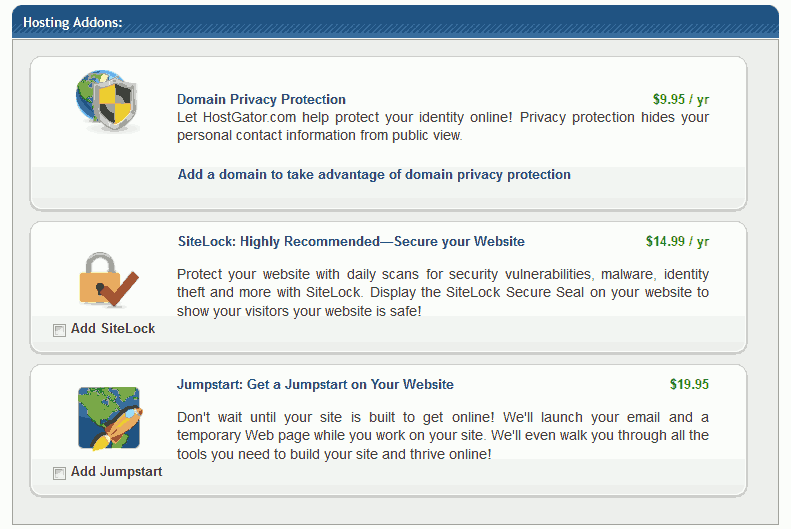
An important point to note is that you will only be able to add domain privacy protection if you select the “Register a new domain” option. If you do decide to register your domain with HostGator I would recommend you buy the privacy protection. HostGator are not the only company to offer this service. I use Namecheap to register my domains and they also offer privacy protection.
You will notice a coupon code has appeared. This is often an auto-populated field that does not always display the best coupon offer, even though it states that it is. So search for “hostgator coupon code” and the chances are you will find a better offer.
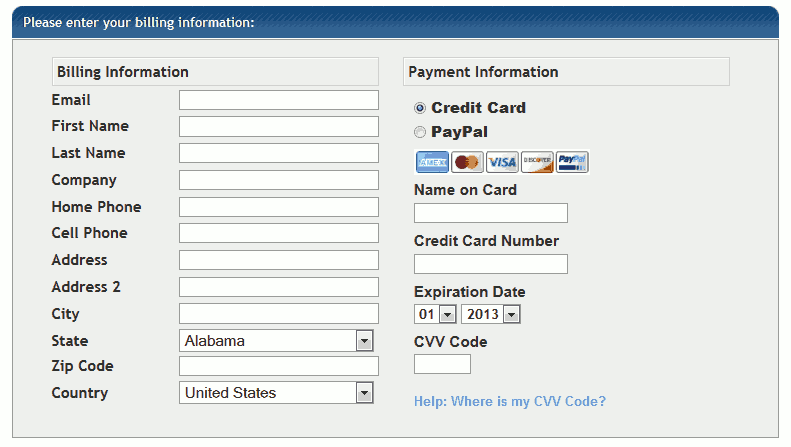
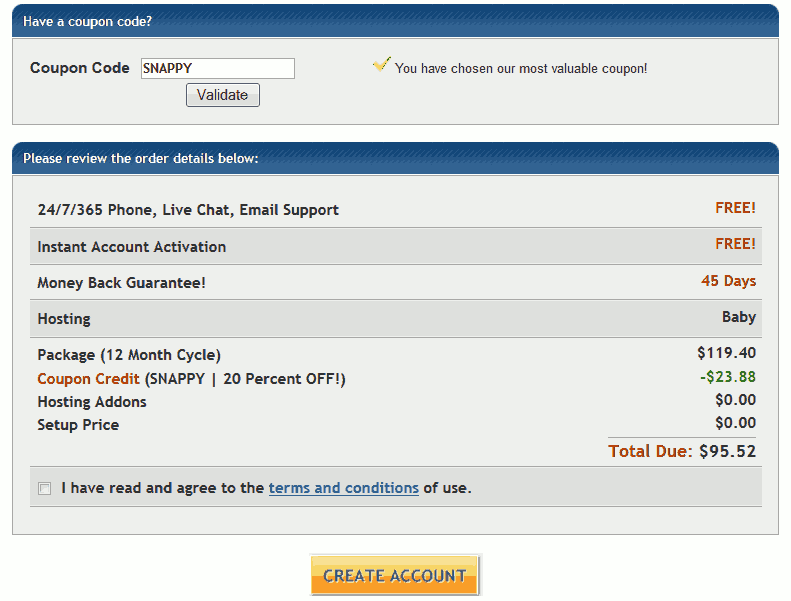
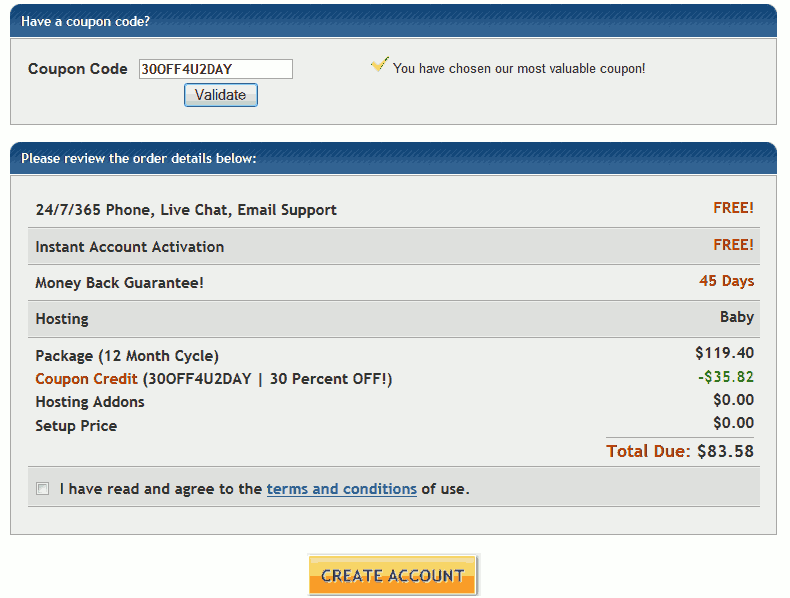
I took my own advice and searched for “hostgator coupon code” and as you can see in the following screenshot I instantly found a coupon that saved an extra $11.94. Once you are happy you have entered the best value coupon available you need to agree to the terms and conditions and click on “Create Account”.
Once you have created your account you will receive an email from HostGator. It will include your control panel (CPanel) address, username and password. It will also include your name server details. If you registered a domain with a different provider, you will need to change the name servers of your domain with the ones supplied from HostGator.
For your blog or website to come alive, unless you are a website programming expert you will need a Content Management System. These systems help people manage their blogs or websites with relative ease. An ideal solution for this is WordPress, and it’s free!
If you decide to use WordPress then take a look at this post which shows you how to install WordPress on HostGator.
Great information step by step how to install wordpress through hostgator. I will follow thanks for sharing. this website is very informative and so many useful posts which is very important as little mistake leads to troubles in blogging.