If you have registered your domain and hosting with separate companies you will need to change the name servers of your domain. Once done this points your domain to your chosen web hosting provider. I use Namecheap to register my domains and HostGator for my hosting and in this post I will show you how I change my Namecheap name servers. Although I use Namecheap you will find it’s a similar process with other domain registrars.
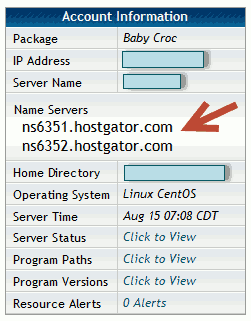
So you have an idea of what they look like here are my HostGator name servers:
ns6351.hostgator.com
ns6352.hostgator.com
If you have set up your hosting with HostGator, the name server details are included in the welcome email that you received. You can also view them from within your HostGator control panel. When logged in scroll down to the bottom left and here you will find your Account Information with your name server details.

How to Change Name Servers at Namecheap
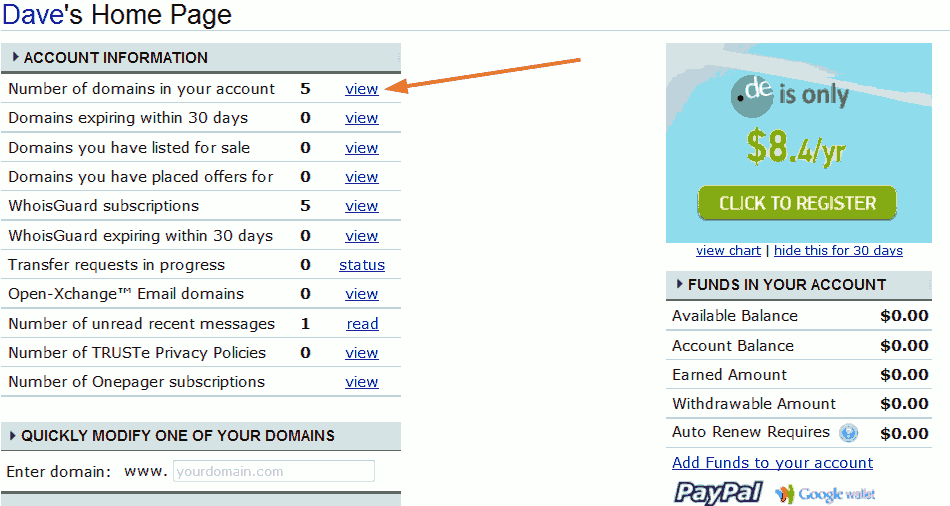
Log in to Namecheap and you will be taken to your home page. Click on view to see your domains.

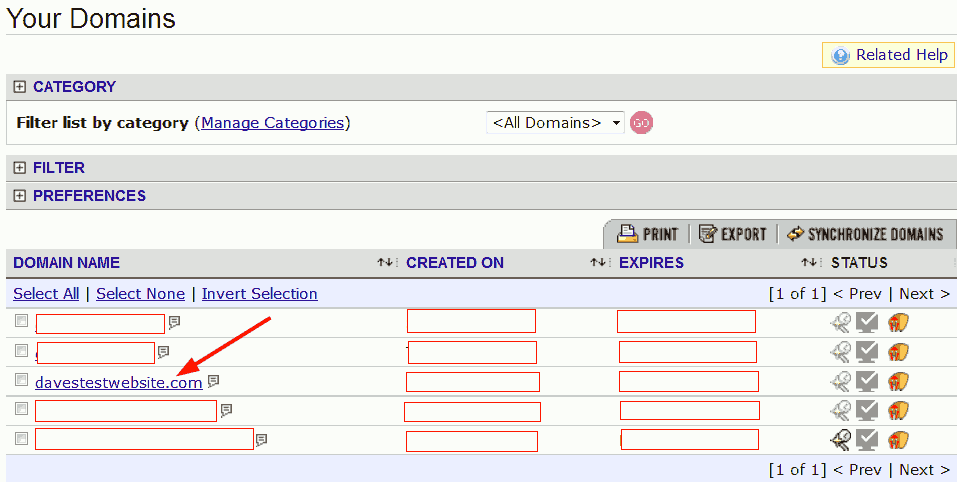
Click on the domain of which you want to change the name servers.

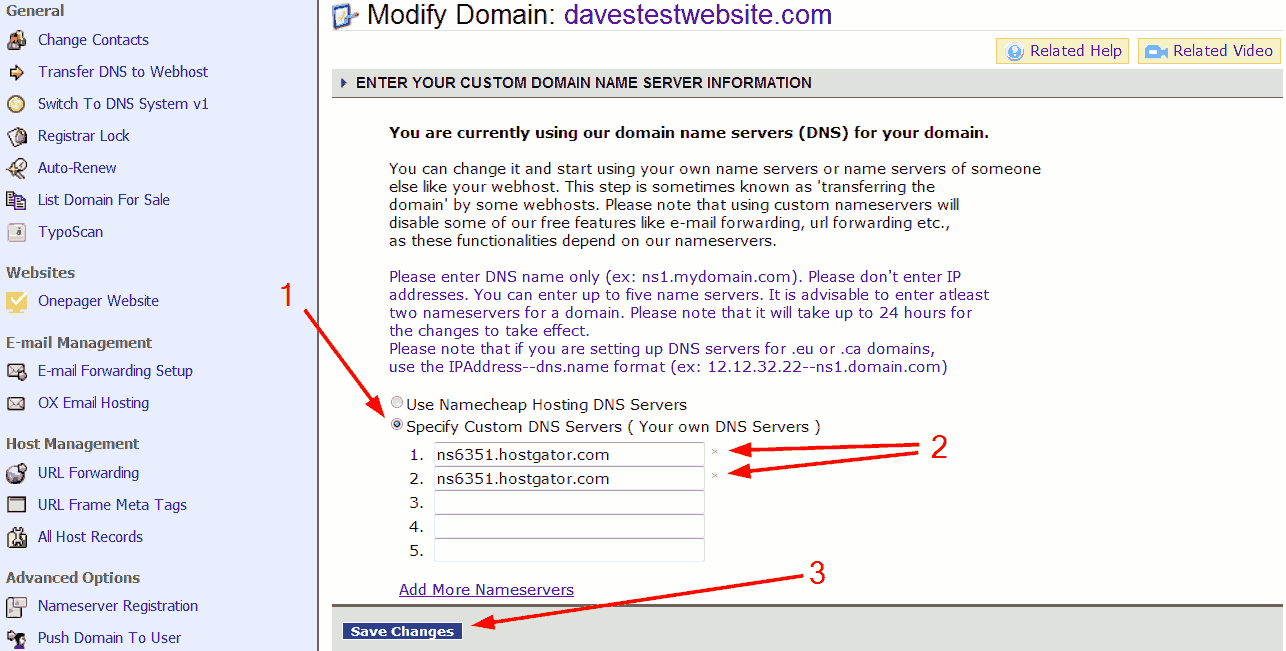
Next click on “Transfer DNS to Webhost”.

Follow the 3 steps shown below:
- Select “Specify Custom DNS Servers”
- Enter your Name Servers
- Save changes

Done!
For the changes to take effect Namecheap advise it can take up to 24-48 hours. So while you’re waiting for the changes to happen, and if you have decided to use WordPress as your Content Management System, now would be a good time to install WordPress if you haven’t done so already.
Leave a Reply