First of all, if you don’t know what WordPress is, here’s my take on it. I think it’s a fantastic tool that enables you to get your blog or website online quickly. I can’t think of a better way of describing it as that’s exactly what it is. It’s well known and widely used and it’s considered by many to be the best blogging platform available.
Installing WordPress on HostGator
There are two easy ways to install WordPress when using HostGator, you can use either QuickInstall or Fantastico De Luxe. In this post I will show you how to install WordPress using both methods. I am also assuming that this is the first WordPress install with your new HostGator account. If it’s not and you want to install WordPess on a second domain, you first need to create an addon domain.
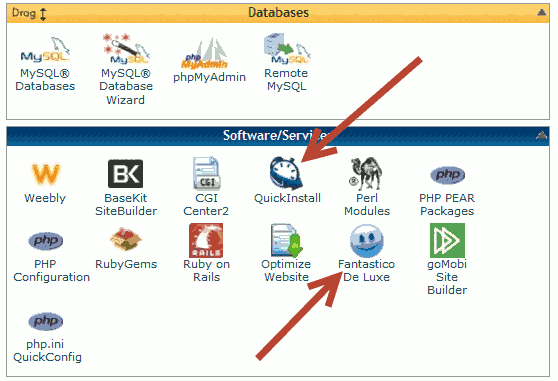
To locate QuickInstall or Fantastico De Luxe, log in to your HostGator control panel, scroll down and you will find them under Software/Services.
Using Fantastico De Luxe
Select “Fantastico De Luxe” from your HostGator control panel. Select “WordPress” then click on “New Installation”.
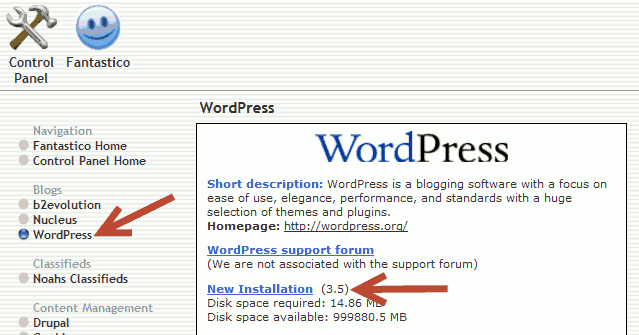
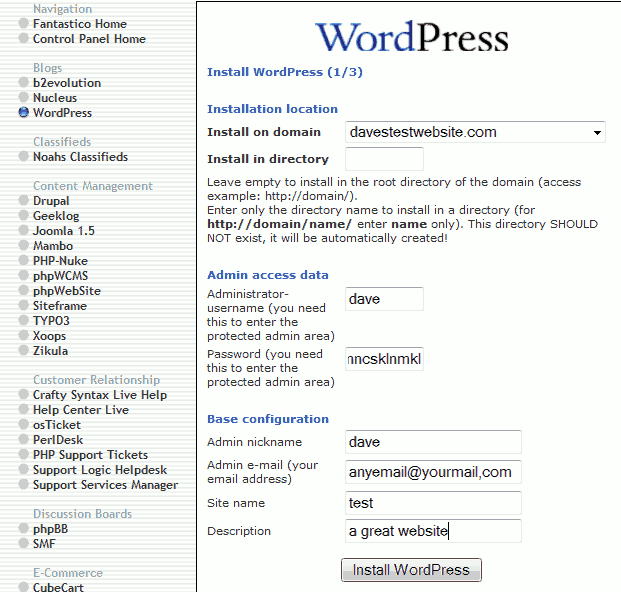
Next you will be given the option to install WordPress in a different directory. An example of when a different directory would be used is when a WordPress blog is required as a secondary part of a website. Some people like to have a static home page and their blog to be a link off that page. I don’t require that type of set up so I am leaving the “Install in directory” field empty.
Choose an administrator username and password. Never use “admin” as your administrator username, reason being previous versions of WordPress used to use “admin” as a default administrator username, hackers would then use this username in their attempts to break into WordPress sites.
If you already have “admin” as your administrator username and want to change it, check out this post: How to Change Your WordPress Administrator Username.
Fill in your base configuration details.
Click “Install WordPress”.
Click “Finish installation”.
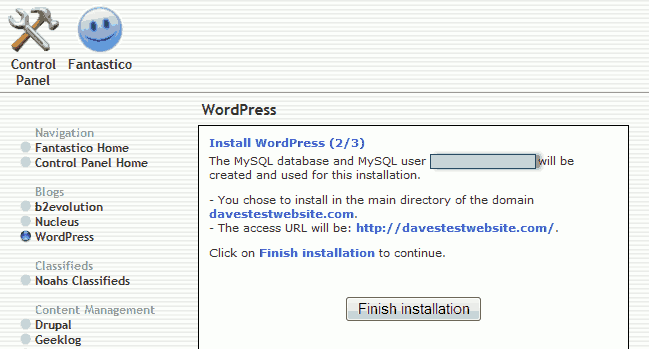
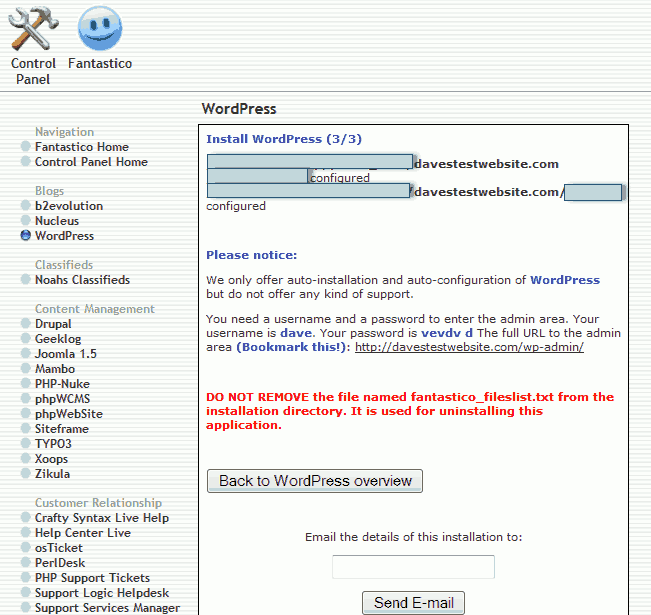
Confirmation of installation shown below. As it suggests it’s useful to bookmark your WordPress admin login URL. If you want an email copy of your details, enter an email of your choice at the bottom of the form and click “Send E-mail”.
Using QuickInstall
Select “QuickInstall” from your HostGator control panel. Select “WordPress” then click on “Continue”.
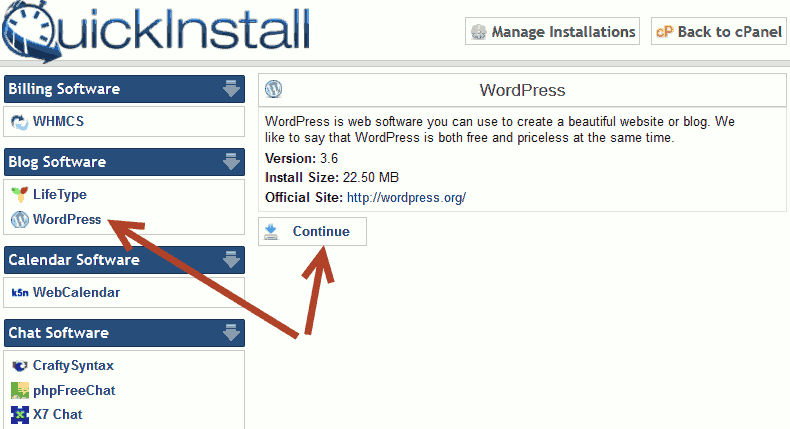
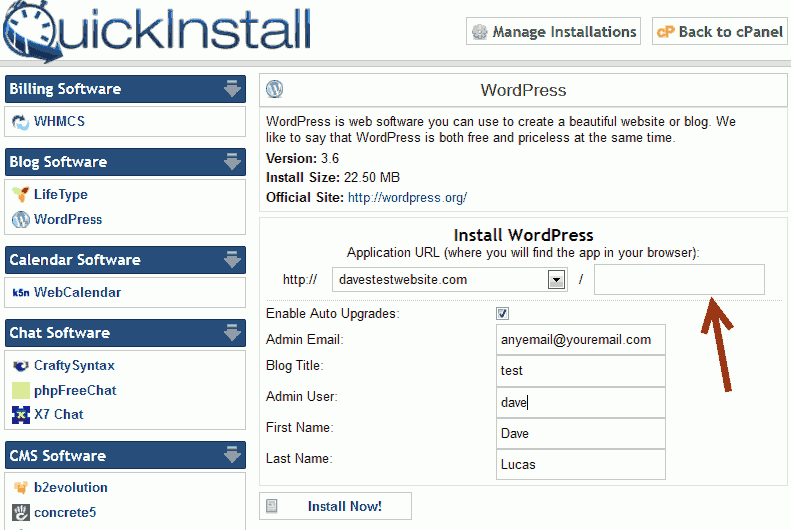
The box I have pointed out below is the equivalent of the Fantastico De Luxe “Install in directory” box, so I’m leaving it empty. The same rules apply for your admin username as mentioned earlier, but in this install you don’t have to enter a password. You can change your admin email, blog title, first and last name after the installation is complete. Click “Install Now”.
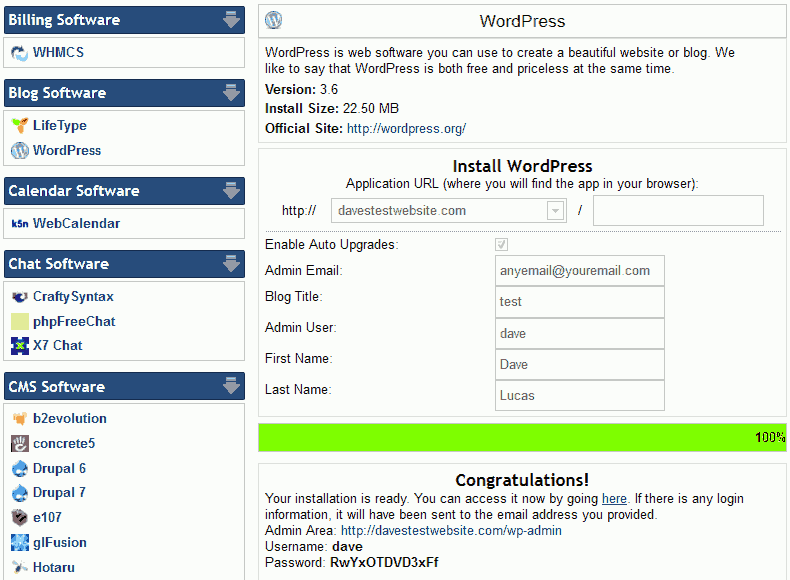
The next screenshot shows the installation was successful.
As you can see, both of these methods are very easy to use.
The differences I found between them are: QuickInstall generates a password for you and automatically installs a plugin called “WP-Super-Cache”. You don’t have to use this plugin, you can deactivate it from your WordPress plugin menu. Also QuickInstall belongs to HostGator, it’s their own in-house auto-installer.
Leave a Reply