If you want to add an additional domain to your HostGator account you first need to register your new domain, then you need to create an addon (add-on) domain via your HostGator CPanel. When the additional domain is up and running it will be viewed as an independent site with no connection to your primary domain.
Creating an Addon Domain
Log in to your HostGator CPanel, scroll down to Domains and Select “Addon Domains”.

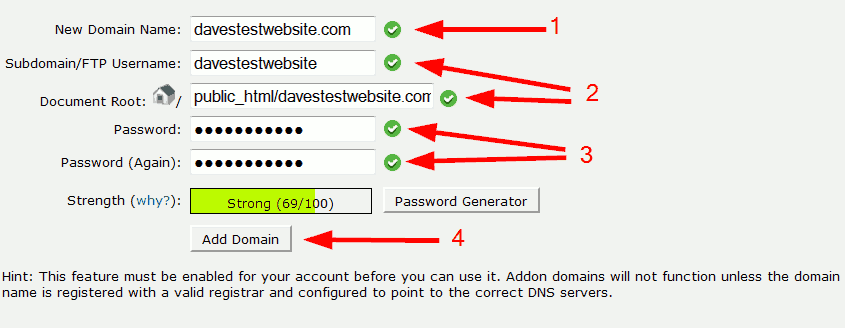
Next you need to fill in your details. I have explained each point below the screenshot.

1. Enter your newly registered domain.
2. The “Subdomain/FTP Username” and “Document Root” information will autofill when you click in either of these boxes.
3. Enter your Password. This password is for an FTP account that is created by CPanel. For security reasons I recommend you use SFTP when transferring files to and from your HostGator account. Check out this post: How to Create a Secure FTP Connection with HostGator
4. Click on “Add Domain”.
You will then see the following screen confirming the addon domain has been created.

So that’s it done.
You can now install WordPress on your new domain.
One last point, don’t forget to change your name server details if your domain is not registered with HostGator.
Leave a Reply