If you are running a blog, the chances are at some point you will need to create an FTP (File Transfer Protocol) connection to your hosting provider. For example, this could occur if you try to upload a file of more than 500MB to your HostGator account. HostGator will not allow file sizes of more than 500MB to be uploaded via their CPanel file manager and they advise you to use FTP to upload files larger than this.
What you need to be made aware of is, if you use plain FTP to transfer your files, your data is being transmitted unencrypted which can be intercepted and read, this includes your passwords! So for security reasons it’s not really a good idea to use plain FTP.
To overcome this I’ll show you how to connect to HostGator using a secure FTP (SFTP) connection.
First of all you need an FTP program. I use FileZilla. I chose it as HostGator recommends it and it’s free. You can download it from here: Download Filezilla.
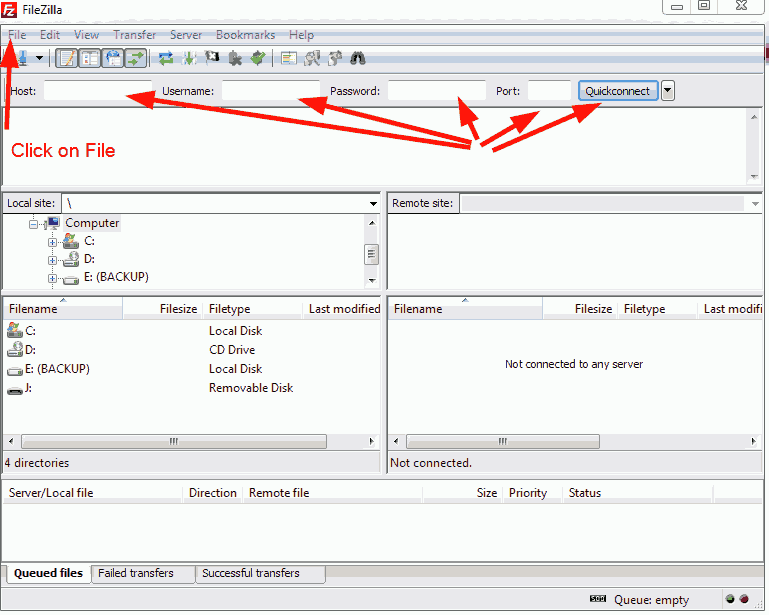
After downloading and installing FileZilla the following screenshot shows you how it will look when opened. On the left you will see your PC files (Local site) and the right side belongs to the server (Remote site) that you will be connecting to.
There are two ways you could set up your SFTP connection using FileZilla. You could fill in your login details in the boxes I’ve pointed out at the top and press “Quickconnect”. Instead I’m going to show you how to use the site manager which allows you to set up and manage multiple connections.
As shown click on “File”.
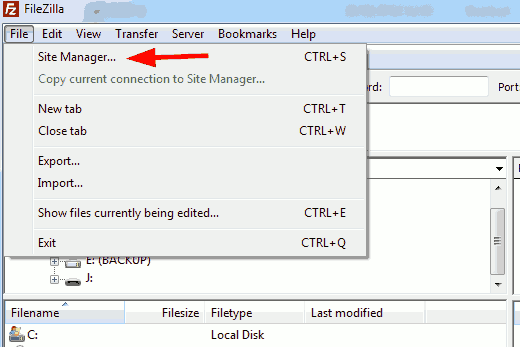
Next select “Site Manager”.
Now click on “New Site”.

Now you need to fill in your details. I have explained each point below the screenshot.
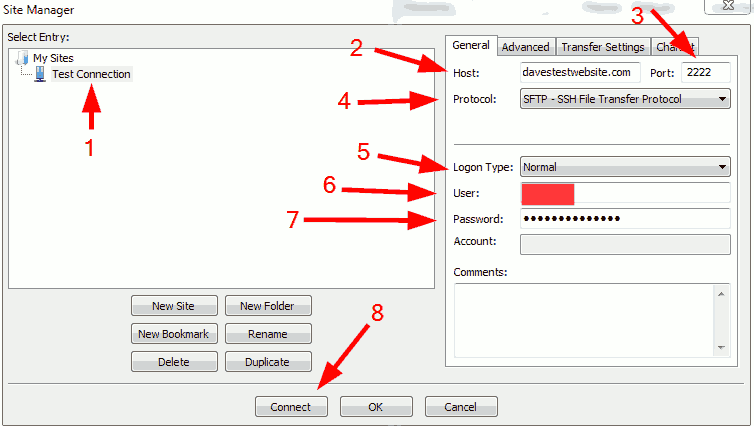
1. Here you can type in a description for your link.
2. In the host field you can enter either your domain name or IP address of your server. For this example I have used my test domain, although I could have entered any of my domain names. Reason being I have the HostGator Baby Plan package which is a shared account and all my addon domains and primary domain use the same IP address.
3. The port number can vary with HostGator depending on what plan you have with them. Here is a quote from their website “SFTP is allowed on any server, and you can connect with PuTTY or WinSCP over port 2222 (port 22 for Dedicated and VPS accounts).” I’ve no idea what that means but I do know I am not using a Dedicated or VPS account, so with my powers of deduction I chose port 2222.
Update: I now use Bluehost as well as HostGator. For a Bluehost secure FTP (SFTP) connection enter port 22. In order for it to work you first need to enable Bluehost SSH/Shell access on your account. If you don’t know how to do this click on this link to learn how.
4. From the drop down menu select “SFTP – SSH File Transfer Protocol”.
5. If you want FileZilla to save your passwords select “Normal” from the drop down menu. If you don’t want FileZilla to save your passwords select “Ask for password” from the drop down menu, then each time you use the site manager to connect it will do just that and ask you for a password.
6. Enter your HostGator Cpanel username.
7. Enter your HostGator Cpanel password.
8. Click on “Connect”. Your details will be saved in the site manager and you will see the next screen.
Click “OK”
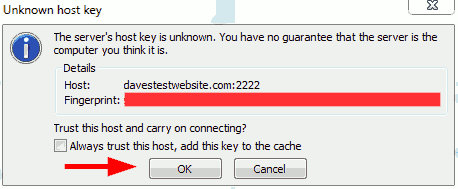
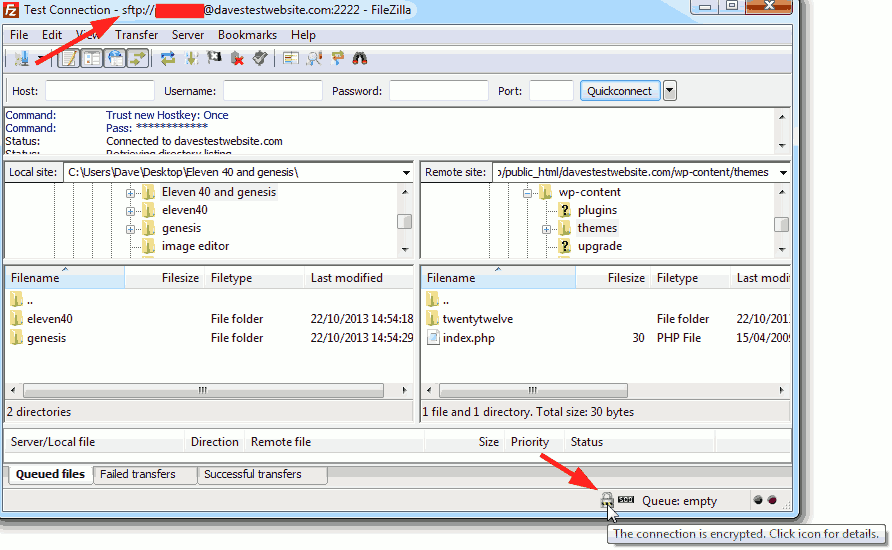
You now have an SFTP connection. If you hover your cursor over the padlock at the bottom it shows your link is encrypted. Also at the top of the screen FileZilla shows your connection is SFTP.
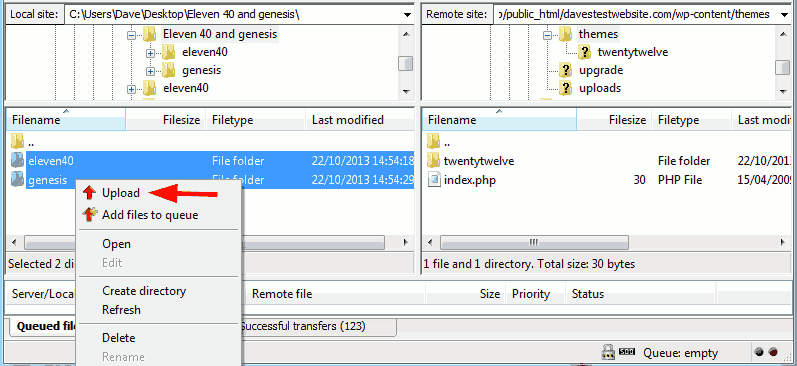
To upload files, select the folder on the right where you want to upload to and highlight the files on the left you want to upload. Right click the highlighted files and select “Upload”. In the example below theme files are going to be uploaded to a WordPress themes folder.
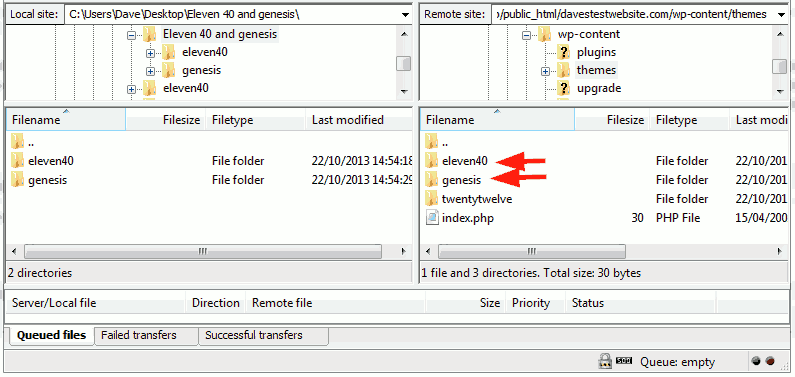
As you can see below the theme files have uploaded.
I used to do this and thought it was secure. But to use SFTP with SSH, you need to generate a certificate, save it as the highest level with Putty Gen and upload the certificate to your SFTP utility. That is more secure when the connection has to pass the matched key code.