In this post I will show you how to install WordPress themes via your WordPress dashboard. I will demonstrate how to install a free WordPress theme directly via your dashboard and also how to use your dashboard to upload a premium theme from StudioPress.
If you do upload a theme, one of the requirements of using the dashboard for a WordPress theme installation is that the theme file must be zipped. If you already have a theme in an unzipped format you can install it by using FTP, which is an abbreviation of “File Transfer Protocol”. This allows you to select your unzipped theme files from your PC and drop them directly into your WordPress theme folder.
Also, if you are having trouble uploading a zipped theme file to WordPress via the dashboard, you could unzip it and use the FTP method to install it. I have explained how to use FTP in this post: How to Create a Secure FTP Connection with HostGator.
I use HostGator and through their Cpanel I also have the option to upload a theme by using their file manager, this is a web interface that allows me to view and manage my files.
Install a Free WordPress Theme
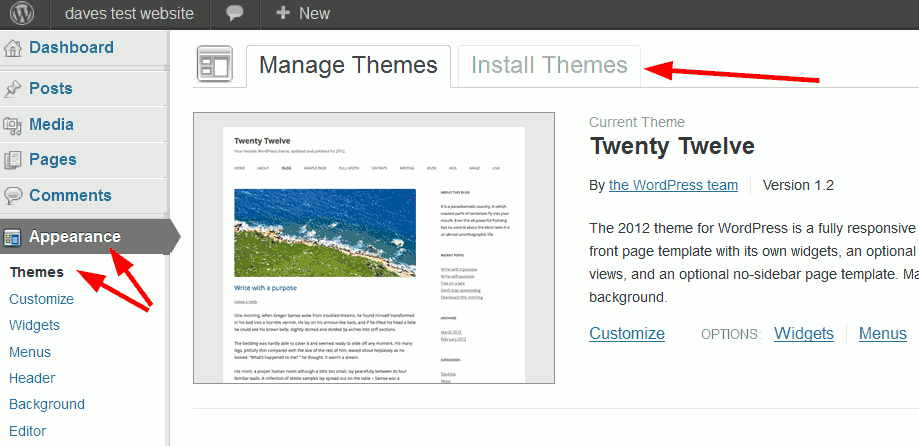
Log in to your WordPress account. Go to Appearance >>> Themes and then click on “Install Themes”.
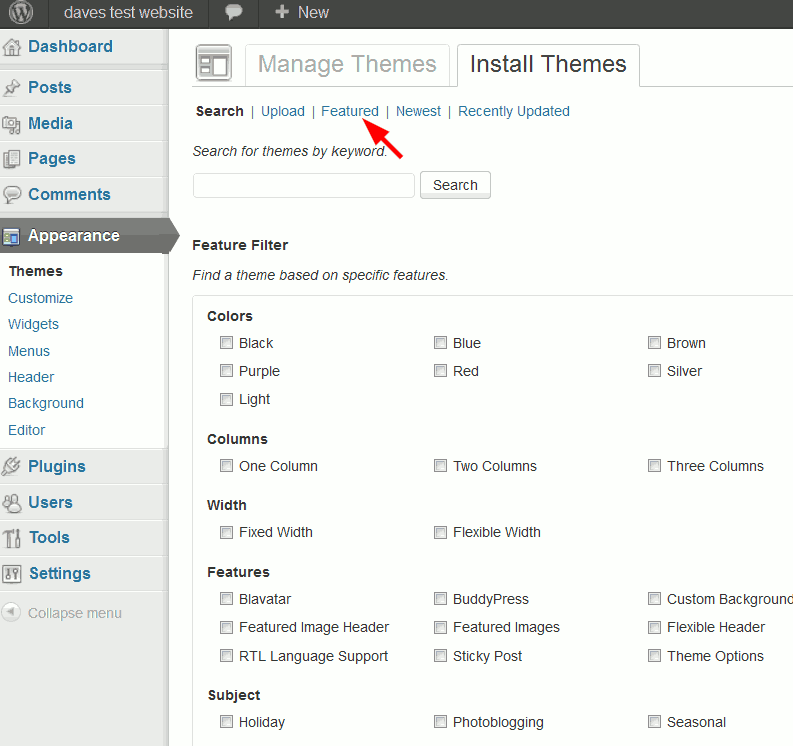
Here you can find a theme that meets your needs by using the various options and categories. For this example I selected “Featured”.
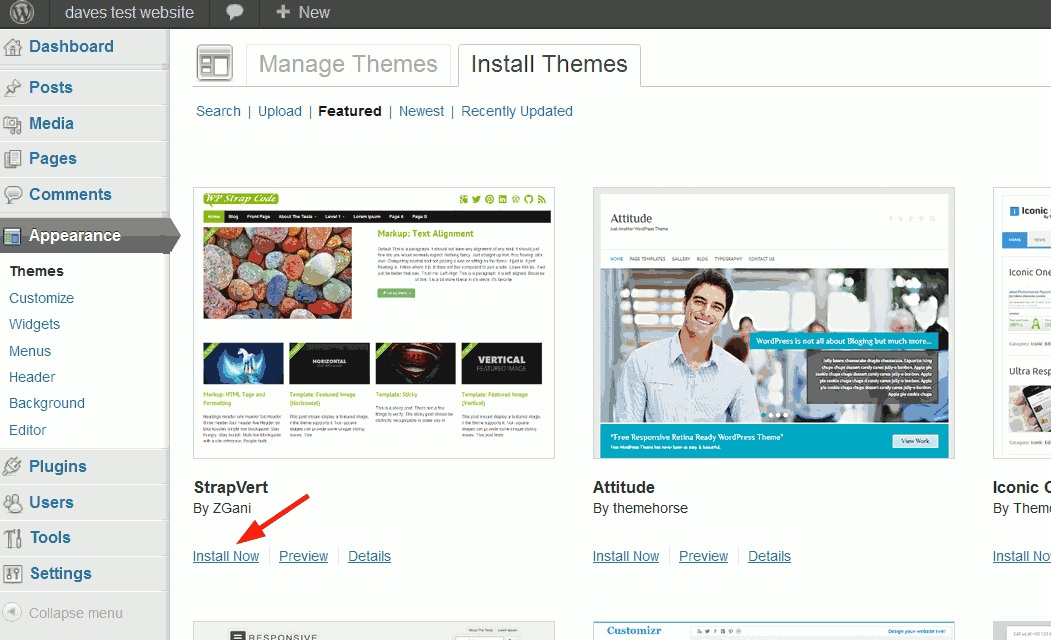
Next you are given a choice of the available themes that match your selection criteria. When you have chosen a theme you like, click “Install Now”.
Once the theme has been installed successfully click on “Activate”.

Your free theme is now up and running.
Install a Premium WordPress Theme
For this example I am going to use a premium theme developed by StudioPress called the eleven40 child theme. This site you are now viewing is using the eleven40 theme. For it to function I also need the Genesis Framework which acts as the parent theme. I have explained the connection between the child and parent theme in this post: WordPress Themes – Free vs Premium.
Although this example is StudioPress theme specific, you would use the same process to install any premium theme. If you are considering using a StudioPress theme, then the following will be of help to you.
Before starting to install a premium theme, you need to download the zipped files from the theme developer and store them in a suitable folder on your computer.
Start exactly the same as when installing a free theme by logging in to your WordPress account and going to Appearance >>> Themes and then clicking on “Install Themes”. This time you need to select the “Upload” option.
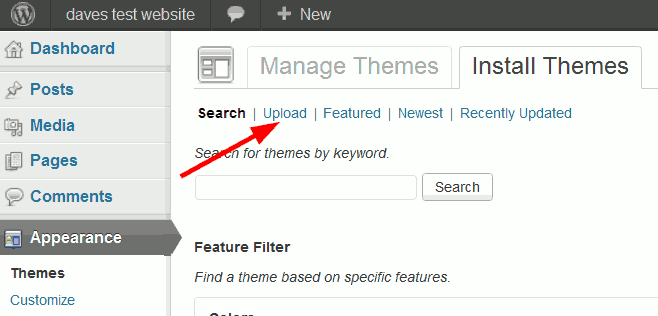
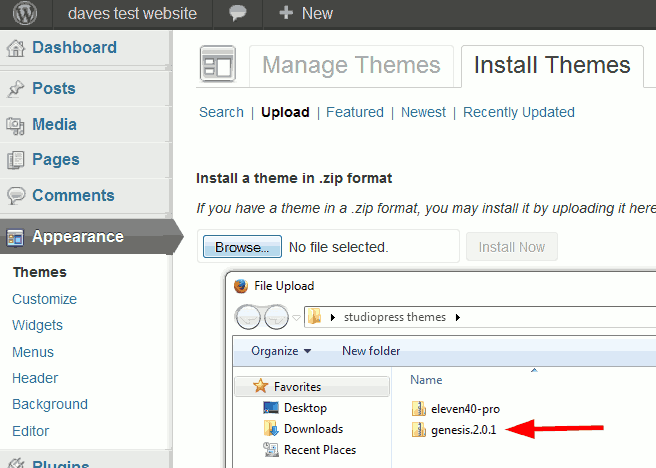
Next click “Browse” and go to the location on your PC where you downloaded your premium themes and select the Genesis file.
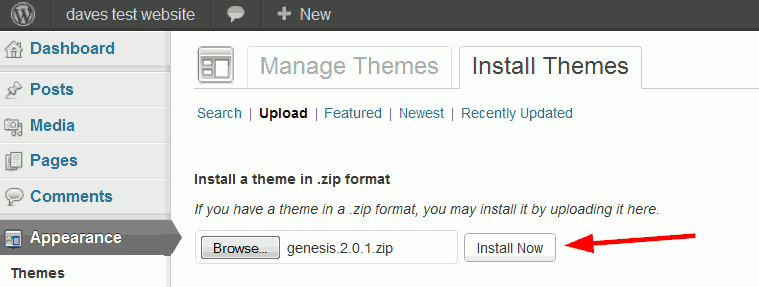
Click “Install Now”.
Once this has uploaded successfully do not activate it. Instead select “Return to Themes page”.

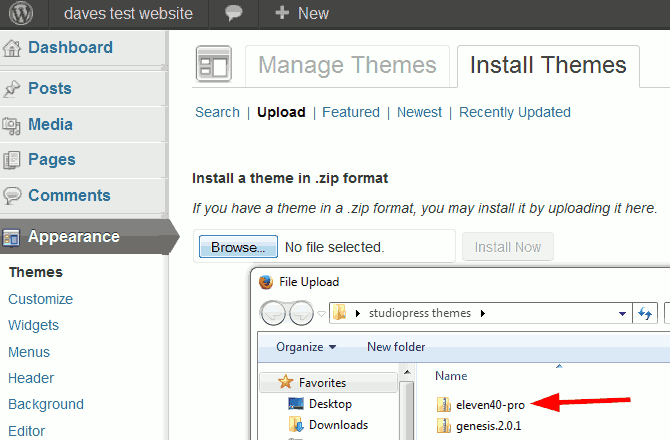
Now you need to go through the same process to upload the child theme.
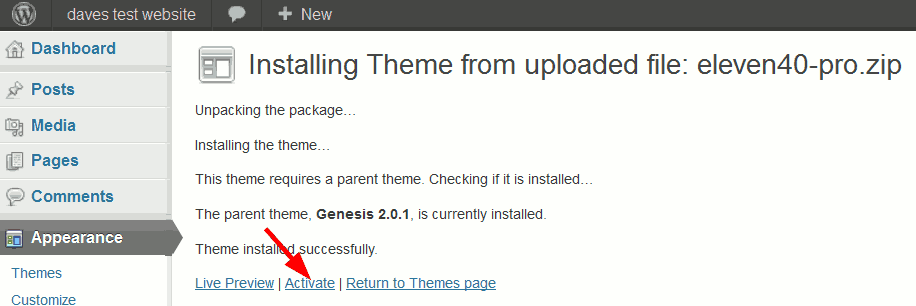
As you can see below, when the child theme is going through its installation process, it knows a parent theme is required for it to work and it automatically checks Genesis is installed. Now click on “Activate”.
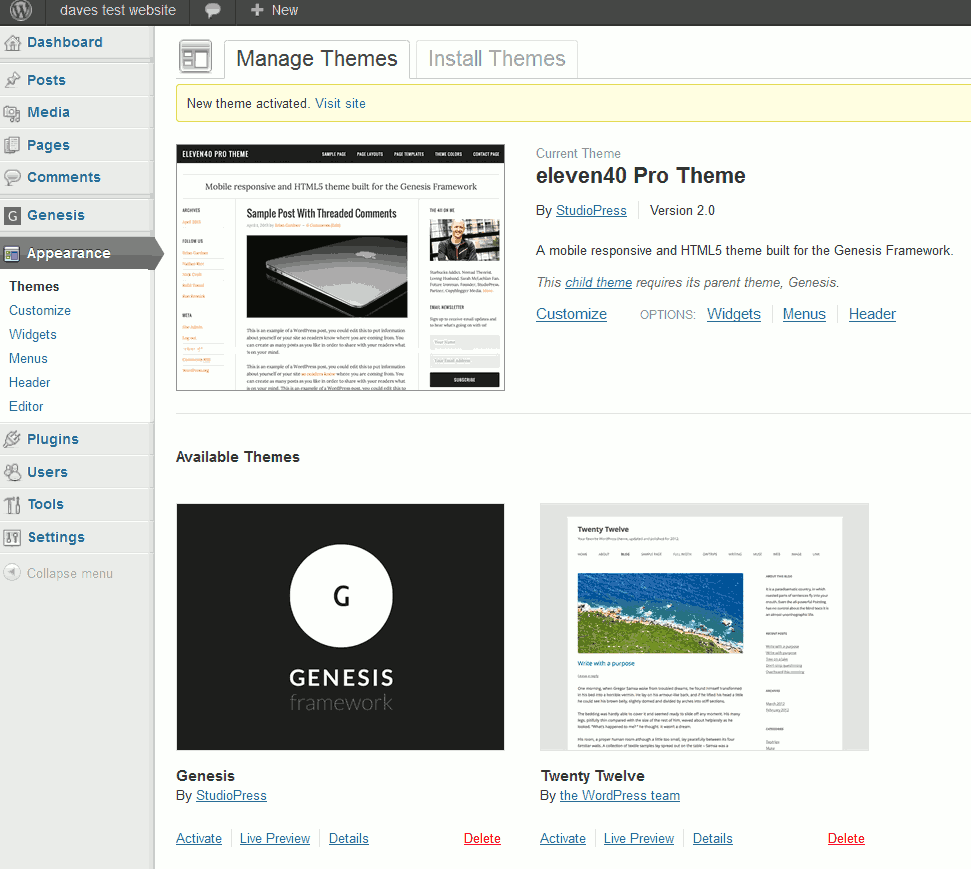
You will then be taken back to the themes page. Here you can see the activated eleven40 theme with the Genesis Framework in the “Available Themes” section. You do not need to do anything with the Genesis Framework as the child theme automatically associates itself with the framework, so do not activate the Genesis Framework.
In a nutshell that’s it. I hope I have demonstrated installing WordPress themes via the dashboard is a very quick and easy process.
Leave a Reply