Using screenshots in a blog post is an excellent way of utilizing visual images to support and guide readers through a process you are explaining. Seeing a visual image can really help the reader understand the action you are describing. I have discovered that there are many free screen capture tools available and of those I have come across my preference is Greenshot. From my experience with it, I highly recommend it.
I like the fact that whilst it is very simple to use, it is an extremely effective screen capture tool. It enables me to take quick screenshots with ease. After I had installed it on my PC, within an hour I had started taking screenshots and editing them for my requirements.
You can download Greenshot from here: http://getgreenshot.org/. However, before downloading please read on.
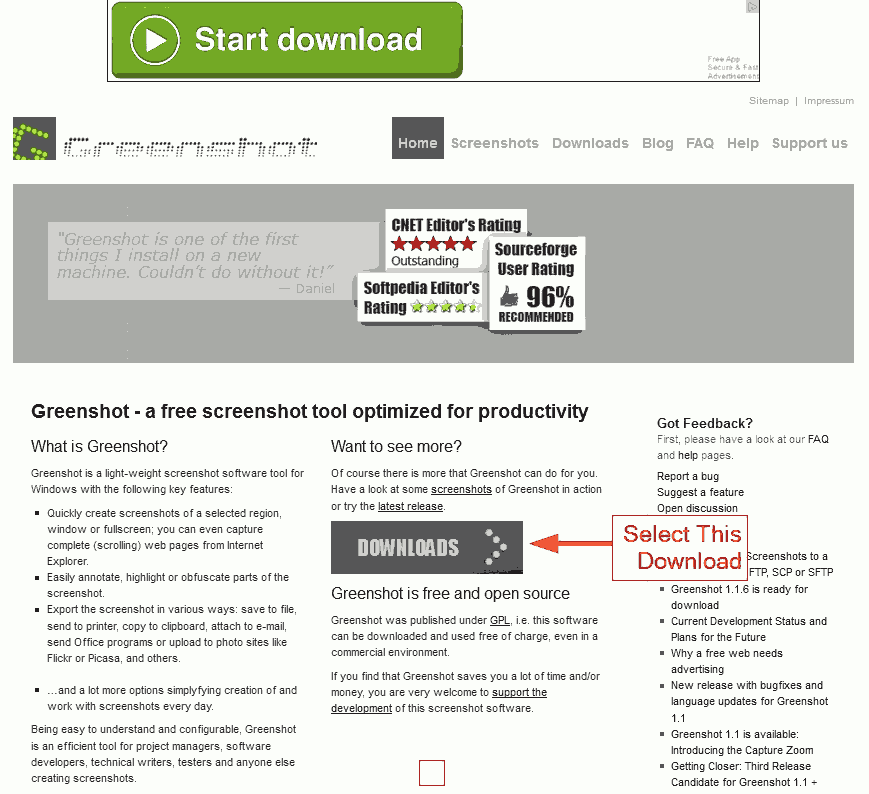
When downloading you must be careful not to select the wrong download button or you could end up installing additional or different software that you didn’t expect.
At the time of writing, the following is a screenshot of the page that you will be taken to when you use the official Greenshot URL shown above. If you see a big green “Start Download” button at the top of the page, ignore it as this is not the correct download link. I have pointed out the correct download link which happens to be the dull grey button in the middle of the page. You may need to go through a couple of these pages before being offered the official Greenshot download.

Below is a quick demo to show you how easy and quick it is to take a screenshot.
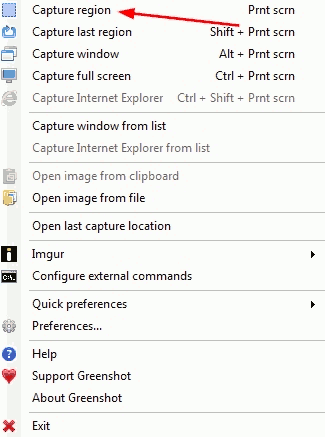
Open Greenshot and select “Capture region”. A cross hair will appear that you control using your mouse. All you need to do is click, hold and drag to select the area you want to capture.

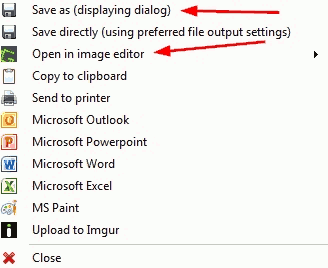
When you have captured an area you will be given the following choices. I generally use “Save as” if I want to save the image in a folder of my choice, or “Open in image editor” if I want to edit the image.

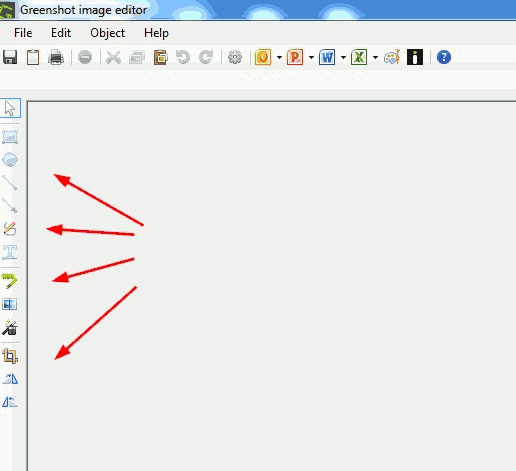
Here is what the image editor looks like. The tools on the left allow you to add text, arrows, crop etc. Once finished you save your screen capture by selecting “File” from the top left and then clicking on “Save as”.

If you get stuck the “Help” option is very useful. It’s not thousands of pages of boring tutorials to run through. It gives a quick brief instruction on how to do certain things.
Another free tool you may find useful is Gimp. It’s an image editing tool. I use it to reduce my image file sizes, although this is a tool that has much more functionality than this.
Those are great applications for screen grabbing for pc.
To add to what has been said earlier, for me its not necessary to get an external screen capturing application.
Don’t get me wrong 🙂 but I prefer using the normal Windows screen capturing button. Which is located in-beween the ‘F12 and Scroll lock’ keyboard button.
This way, its cool, just press the ‘Print Screen SysRq- button then head over to wherever your ‘Microsoft Office’ is at, ‘expand’, click on ‘Microsoft Office Tools’ ‘expand’ again and click on ‘Microsoft Office Picture Manager’ after that right click your mouse and click ‘paste’ or paste using the keyboard ‘ctrl+v’ and u’re done.
Edit it as you like, you can crop, change color, rotate and flip, after editing, then save.
That’s all.